Tuesday, December 30, 2008

Post Holiday "Family" Dinner Party

I really wanted my parents to get to know my "adopted" parents (and sister), so I decided to host a dinner party for everyone. It worked out nicely that Brad was back in Mississippi visiting his family for the holidays b/c my teeny apartment really couldn't hold anymore people! Christy doesn't really eat much so I was really worried what I would serve that she would like, but I was convinced not to let that limit me! I also wanted to try some new recipes (despite that my mom tells me you should never do that with company), so I prepared the following menu:

Appetizers:
Spinach and Blue Cheese Gratin w/ Crackers

Mixed Vegetable platter w/ Ranch

Sides:
Sourdough Rolls
Mixed Green Salad*
Cauliflower Soup

Carrots w/ Garlic and Maple Sauce*

Main Dish:
Parmesan Crusted Chicken w/ Sage Butter Sauce

Dessert:
Lemon Meringue Tarts**
Riesling Wine

* Made by my mom
** Made by Christy

The food was superb (if I do say so myself), and we really enjoyed each other's company!

After dinner we played a rousing round of Pittsburgh Rummy. It was a lot of fun and we all hope to do it again soon!


I am willing to share any of the recipes if you so desire!

Friday, December 19, 2008

On the 7th Day of Baking...

Day 7 -
Another thing Brad has requested me to make was haystack cookies (candy?) as his mom used to always make them for him. I had been given many different variations of this recipe over the years (and could eat them until I made myself sick) but had never made them before. Turns out they are beyond simple, so Brad and I whipped up a quick batch before heading out to dinner with a friend Friday night.

Haystacks
1 package butterscotch chips
3/4 cup peanut butter
2 small packages of chow mein noodles

  • Heat peanut butter in deep pot at medium heat. Then stir in butterscotch chips, reducing heat to low.
  • Remove pot from burner, adding in noodles a little at a time while stirring the mixture.
  • Once all ingredients are coated, spoon out onto wax paper and allow one hour for them to set.

Notes of Interest:
--- A lot of people like peanuts and / or marshmellows added to these. Personally I would have loved some marshmellows but Brad said they were best plain.
--- Whatever you do, keep stirring this mix. If you don't it will burn and be funky. I was actually think doing a double-broiler would have been better than just straight heating this, but I figured I would follow the recipe.

Thursday, December 18, 2008

On the 6th day of Baking

Day 6 -
Since a crazy snow storm stopped me from returning home to my kitchen to bake last night, I missed the official day 6 of baking (chronologically anyway). I am, however, back safely and baking with zeal! I was excited to try some new cookies I found on the Food Network (have I ever mentioned how obsessed I am with the Food Network - or perhaps I should say was, as I no longer have cable) that got 4 stars. I was pretty exhausted and a bit skeptical of these since they had coconut, but I dove in anyway.

Toffee Crunch Cookies
1 cup (2 sticks) butter
1 cup light brown sugar
1 cup white sugar
1 teaspoon vanilla extract
2 eggs
2 cups all-purpose flour
1/4 teaspoon salt
1/4 teaspoon baking soda
1 (10-ounce) bag toffee candy bits
1 cup oatmeal
1 cup sweetened flake coconut
1 cup chopped whole, skinned almonds

  • Preheat oven to 350 degrees F.
  • Cream together the butter, sugar and vanilla.
  • Beat the eggs slightly; then add to the butter mixture and mix well.
  • In a medium bowl, sift flour, salt and baking soda; then add slowly to the moist ingredients and mix thoroughly.
  • Mix in the toffee bits, oatmeal, coconut and nuts.
  • Drop dough by the teaspoonful onto an ungreased baking sheet and bake for 15 minutes.


Notes of Interest:
--- Out of personal preference I substituted pecans for almonds and it worked just fine.
--- This dough may possibly be the best dough I have ever tasted. I should stop and say this is not implying that anyone should ever eat raw dough with eggs in it. I know this is a very bad habit (and completely grosses Brad out), but alas it is my favorite part of making cookies. Anyhow, this dough is like soft granola bars... with toffee... and brown sugar, and, well, it's pretty much heaven. I was so excited that I had found my new favorite cookie. Sadly, when it cooked it just got too hard (or more literally crunchy) for my preference (I'm a soft fluffy cookie person) -- it still worked for me while the cookies were hot, but once cooled the cooked toffee spreads through the cookie and hardens it up. It is still a great tasting cookie though.
--- Ignore the listed direction to bake these cookies for 15 minutes. Whoever wrote that should be kicked out of the kitchen! I personally believe most baked goods (brownies, cookies, pies) taste best slightly undercooked - so these worked for me about 11 minutes, but if you didn't I wouldn't leave them in any longer than 13 minutes max. The toffee will burn quickly and it will make the cookie rock hard.

*** Pics are coming soon of the last few cookies -- I may have lost my card reader and 1 of my SD cards on my work trip. I hope to update at least this one soon but I have to find another card reader first. =(

Wednesday, December 17, 2008

On the 5th day of Baking...

Day 5 -
I have become sort of "known" at work for my brownies. I find this amusing as they are so much easier to make than say, homemade Nestle-Toll House chocolate chip cookies, which I used to make for co-worker's birthdays. But, the people have unanimously prefered brownies, so that is what they get. My good friend's birthday is this Saturday, however, he is a celiac (AKA cannot eat wheat). He was kind enough to buy me gluten-free brownie mix to make him some anyway. I also had planned to make a batch of gluten-filled peppermint brownies (from one of my favorite blog sites) for Day 5, but work would end up getting in the way. I found at at the last minute that I had to go on a work trip leaving that evening, so my baking would have to suffer for the night. Therefore, both batches ended up box made. I felt like Milli-Vanilli making boxed baked goods, but there really was no other choice. They did come out fab. though, I must admit.

Monday, December 15, 2008

On the 4th day of Baking...

Day 4 -
I'm not sure how or why it is so much fun to make cookies with cookie cutters and then decorate them, but it really is. It makes me feel a tad juvenille, but I really don't care as I grin from ear to ear and make an absolute mess. It is divine. My only minor complaint was that I made them alone, I really should have waited for Brad to join me as I'm sure he would have enjoyed it too! Oh well, 8 more days of chances for that! (Plus he has some he has requested to join in on.) =)

Alton Brown's Sugar Cookies

3 cups all-purpose flour
3/4 teaspoon baking powder
1/4 teaspoon salt
1 cup unsalted butter, softened
1 cup sugar
1 egg, beaten
1 tablespoon milk
Powdered sugar, for rolling out dough


  • Sift together flour, baking powder, and salt. Set aside.
  • Place butter and sugar in large bowl of electric stand mixer and beat until light in color.
  • Add egg and milk and beat to combine. Put mixer on low speed, gradually add flour, and beat until mixture pulls away from the side of the bowl. Divide the dough in half, wrap in waxed paper, and refrigerate for 2 hours.
  • Preheat oven to 375 degrees F.
  • Sprinkle surface where you will roll out dough with powdered sugar. Remove 1 wrapped pack of dough from refrigerator at a time, sprinkle rolling pin with powdered sugar, and roll out dough to 1/4-inch thick. Move the dough around and check underneath frequently to make sure it is not sticking. If dough has warmed during rolling, place cold cookie sheet on top for 10 minutes to chill.
  • Cut into desired shape, place at least 1-inch apart on greased baking sheet, parchment, or silicone baking mat.
  • Bake for 7 to 9 minutes or until cookies are just beginning to turn brown around the edges, rotating cookie sheet halfway through baking time.
  • Let sit on baking sheet for 2 minutes after removal from oven and then move to complete cooling on wire rack.


Notes of Interest:
--- Since I didn't have a whole lot of time, I actually didn't make the frosting myself (I know, it should be a sin), but I found the greatest frosting in a little container that worked fine. It also sets SUPER fast, which was good for stacking the cookies for storage, but it was so fast I thought I could ice them all and then come back and add sprinkle them - I was sorely mistaken. I learned my lesson fairly quickly though and was able to fix the rest.

Sunday, December 14, 2008

On the 3rd Day of Baking...

Day 3 -

After weeks of drooling over the Peppermint Bark on the cover of the Williams-Sonoma catalog, I almost gave in on a weak moment and ordered some. That is, until I saw the price -- $26 a tin! Holy cow! I mean I know this stuff is truly to die for and peppermint oil/extract is not cheap, but seriously? Especially since I happen to know bark is possibly the simplest thing in the world to make (my dark chocolate pistachio bark is yum-o), I was not going to give in, I was going to make my own.

Layered Peppermint Crunch Bark
17 oz. white chocolate, finely chopped
30 red/white striped peppermint candies, coarsly crushed
7 oz. bittersweet chocolate, chopped
6 Tbsp. whipping cream
3/4 tsp. peppermint extract


  • Turn baking/cookie sheet bottom side up, and cover with tin foil.
  • Mark a 12 x 9 inch rectangle on the foil.
  • Stir white chocolate in a double boiler until candy thermometer reaches 100 degrees. (chocolate will feel warm to the touch)
  • Remove from water and pour 2/3 cp. melted white chocolate onto rectangle on foil.
  • Using an icing spatula, spread chocolate to fill rectangle. Sprinkle with 1/4 cp. crushed peppermints. Chill until set, about 15 minutes.
  • Double boil dark chocolate, then stir in peppermint extract and cream until just smooth and melted. Cool to barely lukewarm, about 5 minutes.
  • Pout bittersweet chocolate mixture over white chocolate rectangle and spread. Refrigerate until very cold and firm, about 20 minutes.
  • Re-warm white chocolate until candy thermometer reaches 110 degrees. Working quickly, pour white chocolate over firm bittersweet layer and spread to cover. Immediately sprinkle with remaining peppermints. Chill just until firm, about 20 minutes.
  • Lift foil with bark onto work surface; trim edges. Cut bark lengthwise into 2" strips. Using metal spatula, slide bark off foil and onto work surface.
  • Cut each strip crosswise into 3 sections and each section diagonally into 2 triangles. Keep refrigerated until 15 minutes before serving.

Notes of Interest:
--- The key to any good chocolate baked good (be it pie, candy, cookie, etc.) is GOOD chocolate. I know this seems like something silly, but I have seen too many people buy the cheap chocolate thinking it won't make a difference, but it really does. If you are going to take the time to make it, do it right, buy the quality chocolate.
--- There are a thousand slightly different variations of peppermint bark out there to choose from. Don't be overwhelmed, choose one that suits your comfort level in the kitchen, your personal preference in ratio of white/brown chocolate, and your preference of chocolate sweetness. I personally like the really bitter chocolate since the peppermint and the white chocolate already sweeten the bark so much, but that's just me. I also liked this recipe because it kept the middle layer sort of creamy, almost truffle-esque.
--- I found that cutting the pieces into triangles tended to make the edges crack. Therefore, I resorted to cutting mine in rectangles. I think they still look pretty!

Saturday, December 13, 2008

On the 2nd day of baking...

Day 2 -


My "little sister" Christy makes these INCREDIBLE cookies that I finally stole the recipe for. Since I love them so much it was only fair that they made it into the 12 day baking marathon. I must admit, I was a bit afraid of the idea of sour milk going into anything tasty, but I am an avid fan of these cookies (even though I don't really like butterscotch), so I followed the recipe. Christy says if you don't sour the milk the cookies will be too sweet.

German Butterscotch Jumbo Cookies

1 1/2 cp. milk
3 tsp. vinegar
2 cps. sugar
1 cp. shortening
2 eggs
4 cps. flour
1 tsp. baking soda
1 tsp. salt
2 tsp. vanilla
1 bag (12 oz.) butterscotch chips
1 tsp. cinnamon
2 Tbsp. sugar


  • Preheat oven to 350 degrees.
  • In a small bowl combine milk and vinegar. Let sit 5 minutes for milk to sour.
  • In a large bowl, mix together sugar, shortening, vanilla and eggs.
  • In another small bowl, combine flour, baking soda, and salt. Mix well.
  • Slowly mix in the dry ingredients and the milk to the wet bowl.
  • Add butterscotch chips and mix well.
  • Drop by spoonfuls onto cookie sheet.
  • Mix together cinnamon and sugar topping; sprinkle on each cookie.
  • Bake at 350 degrees for about 13 minutes.

Notes of Interest:
--- The cookies are SO moist and delicious, but truthfully I would add more butterscotch next time. The cookie can handle more.
--- I don't believe these cookies have any true German origins. I believe they were named as such because Christy would make them for her German class in High School!

Friday, December 12, 2008

On the 1st day of baking...


Day 1 -

Brad had been dreaming about Oatmeal Cookies lately, even going so far as picking up the Quaker Oats container (in the supermarket) and telling me that the world's best Oatmeal Raisin cookie recipe was under the lid so we should buy it. He's subtle, eh? Well, not one to resist any baking feat of "worldly" deliciousness, they got chosen as the first days baking. Brad helped me make them, which was fun, and they came out pretty darn well -- once we decided we needed to adjust the oven rack anyhow. The hardest thing may just be getting any left after the 12 days if Brad keeps eating them all!

Quaker Oat's Vanishing Oatmeal Raisin Cookies
1/2 pound (2 sticks) margarine or butter, softened
1 cup firmly packed brown sugar
1/2 cup granulated sugar

2 eggs
1 teaspoon vanilla
1-1/2 cups all-purpose flour
1 teaspoon baking soda
1 teaspoon ground cinnamon
1/2 teaspoon salt (optional)
3 cups Quaker® Oats (quick or old fashioned, uncooked)
1 cup raisins


  • Heat oven to 350°F. In large bowl, beat margarine and sugars until creamy. Add eggs and vanilla; beat well. Add combined flour, baking soda, cinnamon and salt; mix well. Add oats and raisins; mix well.

  • Drop dough by rounded tablespoonfuls onto ungreased cookie sheets.

  • Bake 10 to 12 minutes or until light golden brown. Cool 1 minute on cookie sheets; remove to wire rack. Cool completely. Store tightly covered.


Notes of Interest:
--- I decided not to add in the raisins as I know a certain amount of people don't particularly care for them. I really wish I had though, I think it would have helped with the slightly baking soda taste in the cookie.
--- Brad says these were good, but they weren't the recipe he remembered -- will have to try the other one on the Quaker Oats website next time. It is slightly different enough (shortening vs. flour, etc.) that it may be just the key.

Thursday, December 11, 2008

12 Days of Baking


Somehow Christmas time always seems like such a good time to bake. If nothing else it's a great excuse to heat my apartment without turning the heater on! After debating on what to bake this year and being so overwhelmed with great choices, I decided I'd bake them all. Ok, not all of my favorites, but 12. Sort of symbolic, I thought it would be fun! I'm just hoping I didn't bite off more than I can chew! Figured plates of goodies would make great gifts for some of my coworkers, friends, and such... not to mention the added bonus that I get of snagging some for myself along the way!

Wish me luck!

Wednesday, November 5, 2008

"Frankenstein Brain" Cupcakes

In the spirit of Halloween and my love of baking, I decided to enter the "Booo-tiful Halloween Cupcake Contest" hosted by a blog I like howtoeatacupcake.net. My friend Angie was hosting a Halloween party, to which she suggested we bring goodies, so I figured it was a good excuse! I wanted to create something unique with fall flavorings, so I started pondering all my favorite fall foods and I came up with the following:

"Frankenstein Brain" Cupcakes
(AKA Zucchini Chocolate Chip Cupcakes with Cinnamon Cream Cheese Frosting)

Cupcakes for Angie's party Cupcakes for work

Cupcakes:
1/2 c. butter
1 3/4 c. sugar
1/2 c. vegetable oil
2 eggs
1 tsp. vanilla extract
1/2 c. sour milk or buttermilk
1/2 tsp. ground cinnamon
1/2 tsp. ground cloves
2 1/2 c. all-purpose flour
1/4 c. cocoa
1 tsp. baking powder
1 tsp. baking soda
2 c. finely grated zucchini
1 (6 oz.) pkg. chocolate chips
1 c. chopped walnuts or pecans


  • Preheat oven to 325 degrees F.
  • In mixing bowl, cream butter and sugar. Add oil, eggs, vanilla and sour milk; beat well.
  • In another bowl combine cinnamon, cloves, flour, cocoa, baking powder and baking soda.
  • Slowly add dry mix to liquid mixture.
  • Add zucchini and chocolate chips. Mix well.
  • Pour into muffin tins.
  • Bake for 10-15 minutes.
* NOTE:Since the recipe was for a cake, I added an extra 1/4 cup of milk to make the batter a little less thick.

Frosting:
8 ounces cream cheese, softened
1 teaspoon ground cinnamon
5 3/4-6 1/4 cups powdered sugar
sifted 1/2 cup butter, softened, not margarine
1 teaspoon vanilla


  • Beat together cream cheese, butter, cinnamon and vanilla on medium speed until light and fluffy.
  • Add about half the powdered sugar and beat until mixed well.
  • Gradually add the remaining powdered sugar until you reach a spreading consistency.
* NOTE: I added extra cinnamon and a dash of nutmeg because I like the flavors. I also dyed the frosting green for fun!

The final product:

I am very happy about the way they turned out! A few people (AKA Brad) were a little afraid of zucchini, but for the most part I got really great reactions! Even if I don't win the contest it was really fun to be creative! Not to mention enjoy a sweet treat!

Tuesday, October 28, 2008

Pumpkin Swirl Brownies

After hearing about Martha Stewart's Pumpkin Swirl Brownies from several blogs I like, I decided they were a must try. The recipe can be found here.

Pumpkin Swirl Brownies - side Pumpkin Swirl Brownies - top

I really wish I had thought to take a picture of the whole tray before I cut it though, it was really beautiful!

Unfortunately, I must have done something wrong (or missed a step?) because the batter wa pretty think. When I split into the two sections into the bowl for pumpkin mix and chocolate mix I admit I was tempted to scratch the whole thing. I am really glad I didn't, though my perfectionist side WAS a bit disappointed that they didn't come out quite the right consistancy. When I mixed the oil into the pumpkin side the consistancy turned out perfectly, but there was nothing to help out the chocolate half. Oh well. Perhaps next time I'd add oil to the chocolate half too.

The brownies came out so pretty and my co-workers raved. I con't know if I'd necessarily make these again, but the pumpkin half was excellent and would make for a great pumpkin bread all on it's own. That would definitely be worth a try!

Monday, May 12, 2008

Mother's Day / Glen Ivy Day Spa - 2008

My mom is an Elementary School Principal. While she loves the job most of the time, these last few years have been really hard on her, and I can see how much stress she is taking on, and how the job is really aging her.

Every year, my Dad and "Uncle" Bruce go on a fishing trip in the Spring that always seems to fall on Mother's Dsy. It used to upset my mom, but now it's almost become a joke, and my Mom and I spend the day shopping or something incredibly girly. This year, I wanted to do something special for her (and hopefully take some of her stress off) so I planned a surprise that we could both enjoy. I told her to make the day free, but didn't tell her what the plans were. I think she was about to go crazy from curiosity by the time the day arrived.

I went to her house Saturday night so I could give her card (with a packing list) and wake her up with a light but decadent breakfast.

  • "Mock" eggs benedict - I used an artichoke heart instead of English Muffin, and Black Forrest Ham instead of Canadian Bacon. It was actually an idea from the South Beach diet, though they suggested a light version of the hollandaise sauce but I didn't make it.
  • Strawberries with Whip Cream
  • Chocolate Croissants - something we'd devoured when in Barcelona a few years ago.
  • Lemonade -- I wanted to do Mimosas, but I thought alcohol would be a bad idea before a day in the sun!


(She wasn't happy I was taking pictures of her without makeup on so she didn't let me take many...)


We then left for Glen Ivy Day Spa, where I'd booked us appointments for massages and body wraps. I'd heard great things about the place but had never actually been there. We arrived and I was pleased to see it was so pretty with lush greenery and flowers everywhere.


They had pretty koi ponds (with turtles)...


We spent the day going from the Clay Mud Area, the Mineral Bath, lap pool, lounge pool, to the "The Grotto"... I can't even explain how cool it is there, you'll have to take my recommendation. But let's just say, my mom and I already have a date to come back!


Sunday, April 27, 2008

Hershey's "Chocolate Bliss" / Birthday Party

I discovered HouseParty.com when I went to a Neutrogena party hosted by a friend. Basically the deal is big companies choose to sponsor parties to get the word of mouth going for a new product. You apply to "host" a party, and if you get selected, they send you all the free swag to do it. I had applied for several of them, but had never gotten picked. However, my love of chocolate must have leapt off the pages and I was chosen to host a party for Hershey's newest line of Chocolates, "Hershey's Bliss".

Since the party had to be done between April 25-27, I decided to make it a birthday party too and invite a bunch of girlfriends over for fun, wine, and of course, chocolate. The box o' goodies arrived about a week before the party and I had the hardest time keeping my fingers out of it (AKA I didn't) - the 3 flavors they sent (dark, milk, and "melt-aways") were all incredible.

Anyhow, the evening finally arrived. It was a good group of friends, just enough to feel really cozy, but not be too crowded. (Thanks to all of you who came - it was so much fun!)

I made dinner, chocolatini's and gift bags...


We tried to play an "I Love the 80's game, but it was REALLY hard! Perhaps we would've been better off with "I love the 90's"... hmmm...


Best of all, it was loads of fun and there was chocolate left over!

Friday, March 28, 2008

Fabulous food / condiment must haves...

After attending a baby shower this past weekend and listening to all the moms give advice to the soon to be new mom, I realized that passing on the things we've learned is important. Therefore, being a "foodie", I thought I should pass on some of the things I've learned / can't live without to others who may be newer (or "greener"). As an added bonus, perhaps I'd learn something from others as well!

I do love to cook, however I am usually pretty busy, so I'm a big fan of anything that can make my life easier while making my food 100% better. Therefore, over the years I have come across some serious favorites that I can't live without.

Thankfully all of these also have websites as I don't live where you can access these stores close by! =( (I know, I should move, right?)

(In no particular order)

Super Target:
* Archer Farms Syrup
- It has cinnamon in it -- to die for.
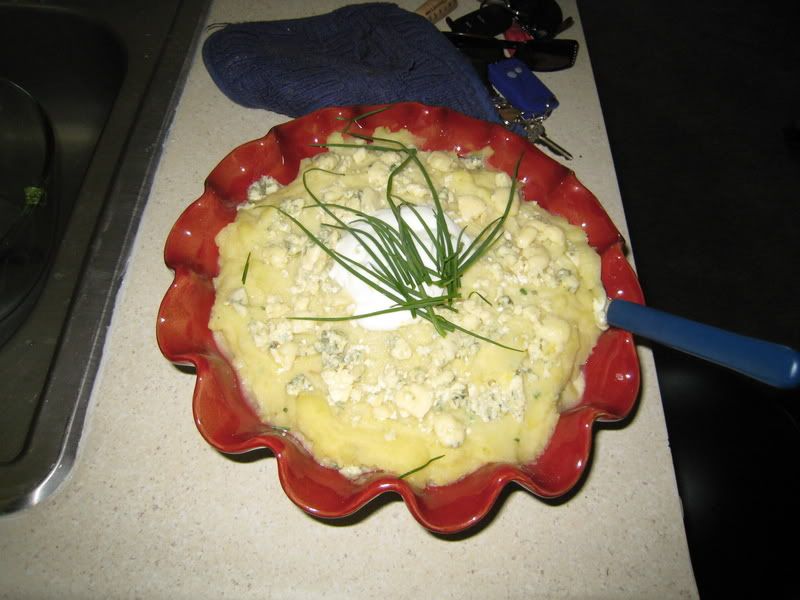
Williams-Sonoma:
* Tupelo Honey
- Fabulous flavor, perfect consistancy alll the time - NEVER congeals!
- Only problem, it's only made (and thus sold) once a year, so you have to make sure to get one when it's on sale!

* Nielsen - Massey Vanilla
- Trust me, you can taste the difference between this and the cheap vanilla extract - it's worth every penny.

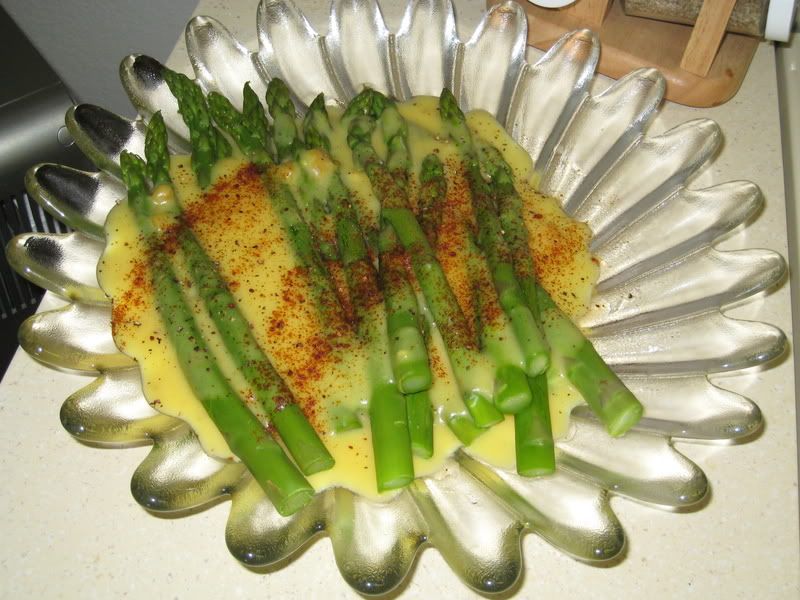
* Fig and Meyer Lemon Balsamic Vinegar
- Makes the BEST salad dressing w/ only a little olive oil and pepper
- Only drawback, it's a "refrigerate after opening" item unlike most vinegars....

FlavorMagic.net:
* Gourmet Seasoning Sheets
- Easiest seasoning ever, fabulous flavor, and last forever in your pantry!
- My personal favorite is the "Yucatan Chipotle and Lime" (killer on shrimp for a great salad topper), but I haven't tried one I didn't like.

Sunday, March 23, 2008

Easter Dinner Party

Since I moved into my new apartment, my parents have been wanting to see what it looked like. So, I decided to host an Easter dinner w/ my parents, and Brad and I. It gave me an excuse to have them over and an excuse for me to get fully unpacked and the apartment decorated in time for guests to come over.

I've also never held my own dinner party before, and growing up with a mother who could win awards for Best Hostess, I really wanted to make a good impression! I also wanted to make a good meal that everyone would enjoy and not be too stressed out as well.

So I planned a menu...
Appetizers:
Cheese & Crackers
Wasabi Almonds
Deviled Eggs

Sides:
Fresh Green Salad
Warm Sour Dough Rolls

Main Course:
Honey Baked Ham
Yukon Gold Garlic Mashed Potatoes

Roasted Asparagus w/ Hollandaise Sauce


Dessert:
Vanilla Ice Cream w/ Spiced Pear Compote -- Provided by my mom

My new table all set up - isn't it pretty?


And let everyone drink wine, enjoy good food, and play a fun game called "Blokus"!


Overall, I was pleased - seemed like a success!

Friday, March 14, 2008

German Chocolate Cake - Dad's B-day

My Dad LOVES German Chocolate Cake like none other. However, noone in my family ever liked it much so he didn't normally get it as his birthday cake (sad!) when I was growing up. Therefore, now that I'm an adult, and have no clue what to buy him for his birthday, I've started a tradition (this year being the 3rd year) of getting him a GC cake and bringing it in to work (since we work together) and doing the whole singing / celebrating thing there. The past two years I've bought him a store bought cake, and even though I had them write "Happy Birthday" on it, it just felt a little trite. So this year, I decided I'd try to make him a home-made one.

Needless to say, it got rave reviews. My Dad said it was one of the best GC cakes he'd ever eaten (hey, at least he's complimentary even if it wasn't true) and I was proud b/c I've really been trying to make things not just taste good but be pretty too.

Here's the final cake:


I made a little one for Brad too while I was at it. I know I spoil him, but isn't that what girlfriends are for? =)